Adding members
Once you have created your project, one of the first steps is to assign the right team members to it, in order to start planning and allocating work. Members can be added in the creation flow or in the Resources tab in the project. When adding a member, you can fill out the following information:Filter by position and/or skills
Filter individually or stacked to find the right members for your project.Role
Select wether the member is a project lead or member. There can only be one project lead.Member rates
When a member has been selected, this field will be automatically filled if the member has a defined position, as per their profile. If you wish to change the project rate, or the member does not have a pre-defined position rate, you can give a custom rate. This custom rate will be inherited on tasks.Role description
When a member has been selected, this field will be automatically filled if the member has a defined position, as per their profile. E.g: Peter’s position in Acme Inc workspace is a “Senior Consultant”, therefor his default role description in a project will be the same. You can always overrule this description. The project defined description will be inherited on tasks by default. Learn more about task member rate and role description sources in this section on task creation..Viewing and creating allocations
In the resource tab, the timeline view gives you a real-time heatmap of all your project members. It’s important to note, that the heatmap takes into consideration allocations across the entire workspace for each member, to ensure you have the most accurate overview of available resources, under or overbookings. In the top right corner, you can select which zoom level to view the timeline in:- Day (most accurate)
- Week
- Month
- Quarter
- Year
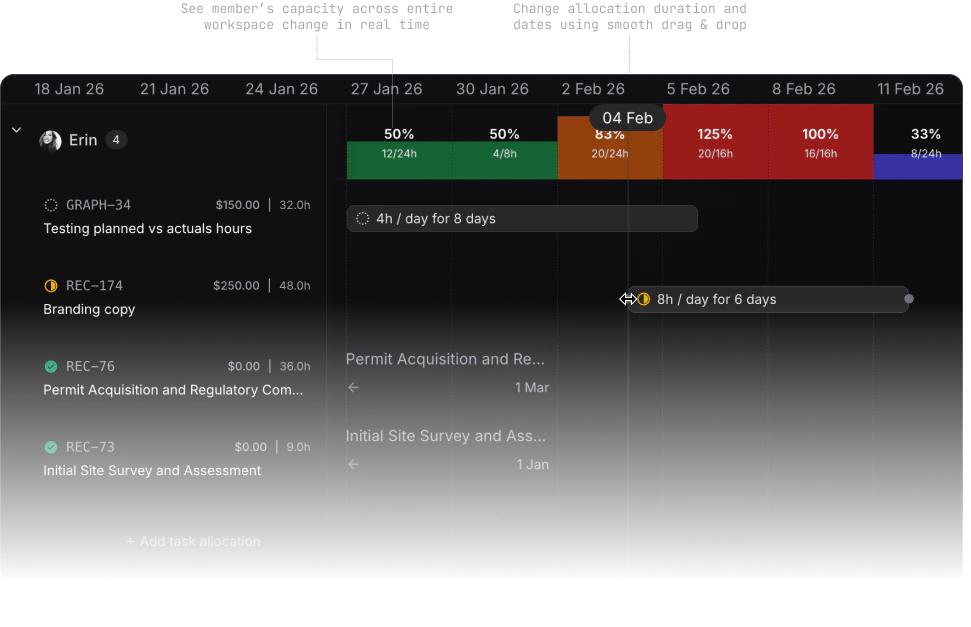
How to allocate
How to allocate time to members - in depth.